


Turn your Raspberry Pi into a browser-based KVM.
- Video capture (HDMI/DVI/VGA)
- Keyboard forwarding
- Mouse forwarding
- Fullscreen mode
- Paste text from clipboard
TinyPilot official hardware packages give you everything you need to run TinyPilot and allows you to fund TinyPilot's development for future improvements.
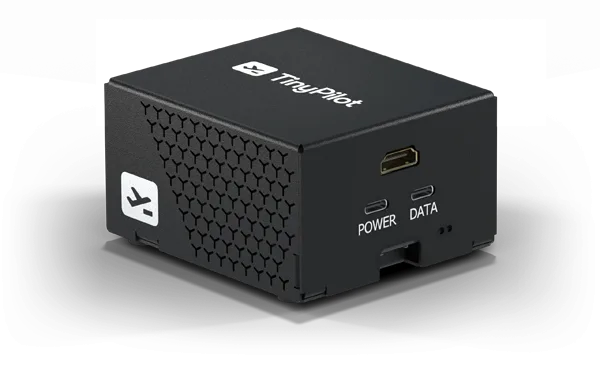
Voyager 2a is TinyPilot's professional-grade KVM over IP device. Its quiet, compact design makes it a great fit for professional environments such as offices, data centers, and server rooms.
- Raspberry Pi 4B
- HDMI to USB dongle
- They have no brand name, and there are several variants, but they're all built on the same MacroSilicon 2109 chip.
- They're available for $10-15 on eBay and AliExpress.
- 3 Amp power supply
- USB-C to USB-A cable (Male/Male)
- microSD card (Class 10, 8 GB or larger)
- HDMI to HDMI cable
- Or [other] to HDMI, depending on how your target machine displays output.
- (Optional) A USB-C OTG split connector: Supports continuous power when the target computer turns off.
- Requires two additional USB-A to microUSB cables and a 3 Amp power adapter.
- If you're using this split connector, choose a USB-C to USB-A cable that's 12" or shorter to minimize voltage drop along the cable.
- (Optional) VGA to HDMI Adapter - If your target system has VGA output.
- Alternatively, you can replace the VGA to HDMI adapter and HDMI to USB dongle with a VGA to USB adapter.
See "TinyPilot: Build a KVM Over IP for Under $100" for a more detailed tutorial on how to assemble these parts to create a TinyPilot.
- A Raspberry Pi 4B running Raspberry Pi OS Bullseye (32-bit)
You can install TinyPilot on a compatible Raspberry Pi in just two commands.
curl \
  --silent \
  --show-error \
  https://raw.githubusercontent.com/tiny-pilot/tinypilot/master/get-tinypilot.sh | \
    bash - && \
  sudo reboot
When your Pi reboots, you should be able to access TinyPilot by visiting your Pi hostname in the browser. For example, if your device is named raspberrypi:
If you're using an HDMI to CSI capture chip (such as with a TinyPilot Voyager series device), see the additional configuration steps required for video capture.
See the CONTRIBUTING file.
If you're having trouble with TinyPilot, you can retrive logs from the web dashboard by clicking "Logs" in the bottom of the main dashboard.
If you can't access the web dashboard, you can retrieve the logs by SSHing into the device and running the following command:
sudo /opt/tinypilot-privileged/scripts/collect-debug-logsThis log is useful if you file a bug report.
You can read more details about the logs in the wiki.
TinyPilot does not support authentication or transport-level encryption. You should only use TinyPilot on networks that you trust. Anyone who accesses the TinyPilot URL can shutdown or restart your Pi and type arbitrary commands into the device to which your Pi is connected.
To use TinyPilot on untrusted networks, you can upgrade to TinyPilot Pro, which adds password-based authentication and TLS for end-to-end encryption.
As a free alternative, you can adjust your Nginx configuration (included by default with the installation) to require HTTP Basic Authentication and add a self-signed TLS certificate.
- TinyPilot Wiki: Guides for tasks related to TinyPilot.
TinyPilot would not be possible without the excellent and generous work from many open source projects, the most notable of which are listed below:
For news about major TinyPilot releases and other updates about the project, sign up for the TinyPilot mailing list:
TinyPilot Pro includes additional features for professional users, including:
- Virtual drive mounting and booting
- Password-based authentication
Support the project and upgrade to Pro at https://tinypilotkvm.com/product/tinypilot-pro.