Netbeans development environment
This page contains information about getting set up in and using Netbeans to develop RESOLVE.
For further information about using and configuring Netbeans, see Developing RESOLVE in Netbeans.
Table of Contents
We assume you've installed Netbeans (the Java SE version should be fine), installed git, and forked from the upstream repository.
Open Netbeans and it'll probably look a lot like this:

You'd like to "clone" our upstream repository onto your local machine so you can work with it. Select Team > Git > Clone.

Get the URL from our github project page. Note that we're NOT using your forked repository. That comes later.

And paste it into the Repository URL box:
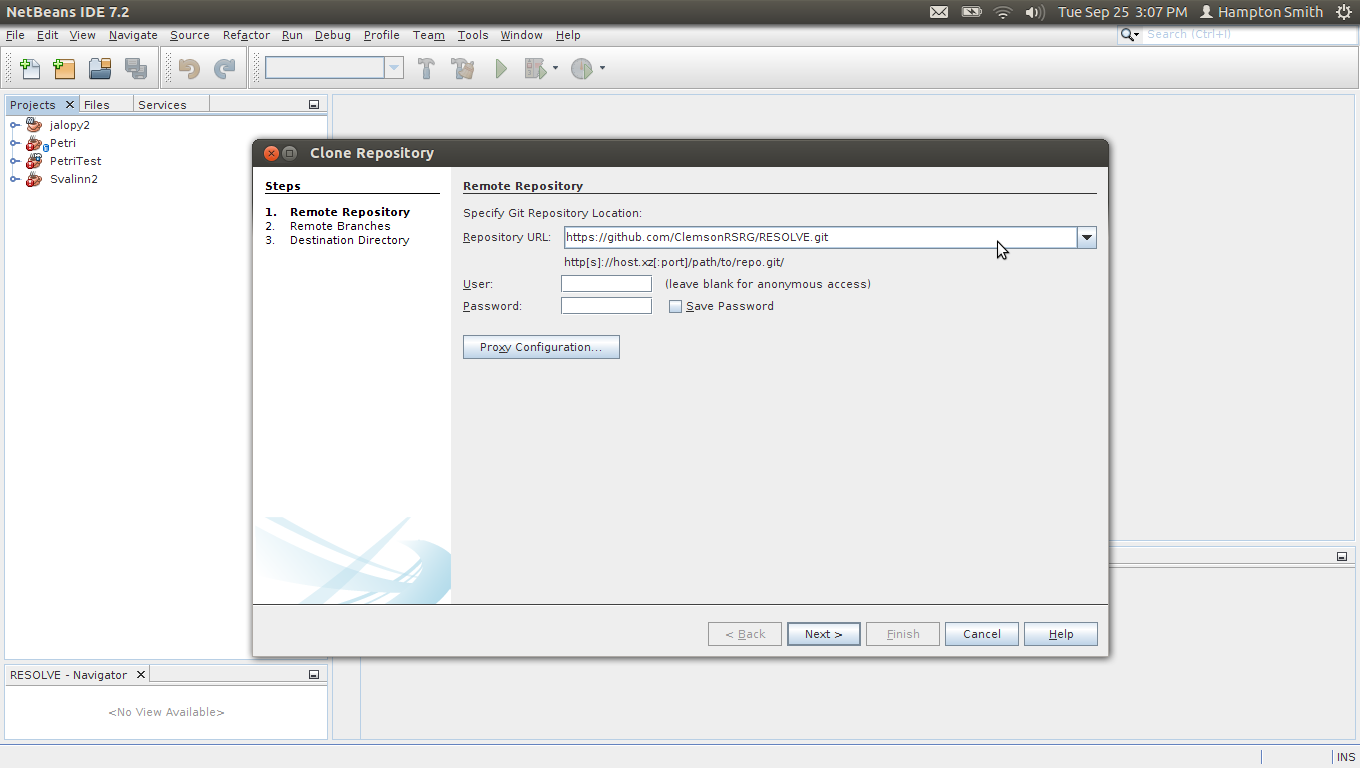
There's no need to provide your username and password at this point. Our git workflow means you'll only ever fetch (i.e., pull down code) from this remote--never push (i.e., upload code).
Then click Next.
Netbeans will want to know which branches of the repository you want to grab. Just master should be good enough for most developers' needs.

Click Next
In the git world, all repositories are created equal--which means your local clone is just "as good" as the remote repository. Netbeans therefore wants some information about the relationship between your local version of the repository and the remote.
The only thing you need to change on this screen is the Remote Field name. This is a friendly name to remind you, locally, what the relationship between your local repository and the cloned remote is. You could name it anything, but for consistency with all other instructions and talking to other developers, call it upstream.

Make sure Scan for NetBeans Projects after Clone is checked (it should be by default).
Other changes are just personal preference: The Parent Directory field is just asking where, locally, the root of the repository should go. The Clone Name field will simply determine the name of the folder that's created at that root. So, for me, by default, my local clone's going to go into: /home/hamptos/NetBeansProjects/RESOLVE/. The default is probably fine, but you can change it if need be (in particular, if you're going to have multiple local clones of the upstream repository,
Click Finish
Netbeans will spend some time downloading the repository information. When it's done, it'll pop up a box asking if you'd like it to open the project, which, of course, you would:

The RESOLVE project will appear in the project navigator pane:

Notice it has errors. This is simply because there are some derived files, like ANTLR grammars, that are missing because they haven't been generated yet. To generate them, just do a Clean and Build.

This may take some time. Netbeans needs to download lots of Maven plugins and then use them to process lots of different files--running the formatter over all our source files, compiling our ANTLR grammers, etc. You'll see lots of text going by in the console.

When it's finally done, the "error" icon on the project will disappear. In the console, you should see BUILD SUCCESS.
That's it! You're good to go. You may want to continue with the next section: RESOLVE Development Netbeans Workflow.
This section is for information on how to run RESOLVE from within Netbeans.
If you simply want to run RESOLVE with the same parameters as your last run, you can press F6 or select Run > Run Project (RESOLVE). If you've never run RESOLVE before, or if you want to change your runtime parameters, you'll need to do the following:
Select Run > Set Project Configuration > Customize.... You can also right-click the RESOLVE project and select Properties.

From the list on the left, select Run.

Next to the Main Class field, there's a Browse button. Click it and select edu.clemson.cs.r2jt.Main. You'll only ever need to do this once--Netbeans will remember in the future.

Next to the Working Directory field, there's a Browse button. Click it and select the root directory of your RESOLVE code workspace--all command line arguments will be relative to this directory. As a result, I like to use the Main directory of the RESOLVE workspace, since all the files I want to work with are beneath it. Again, you only need to do this when you want to change the RESOLVE code workspace root.

Now, set up any parameters you want to give to RESOLVE in the Arguments field.

Click ok.
You can now press F6 or select Run > Run Project (RESOLVE) to run the compiler:

The next time you want to run the compiler with different parameters, just repeat the the above steps to change the command line arguments.
All that clicking can be cumbersome to change command line arguments. I prefer this way:
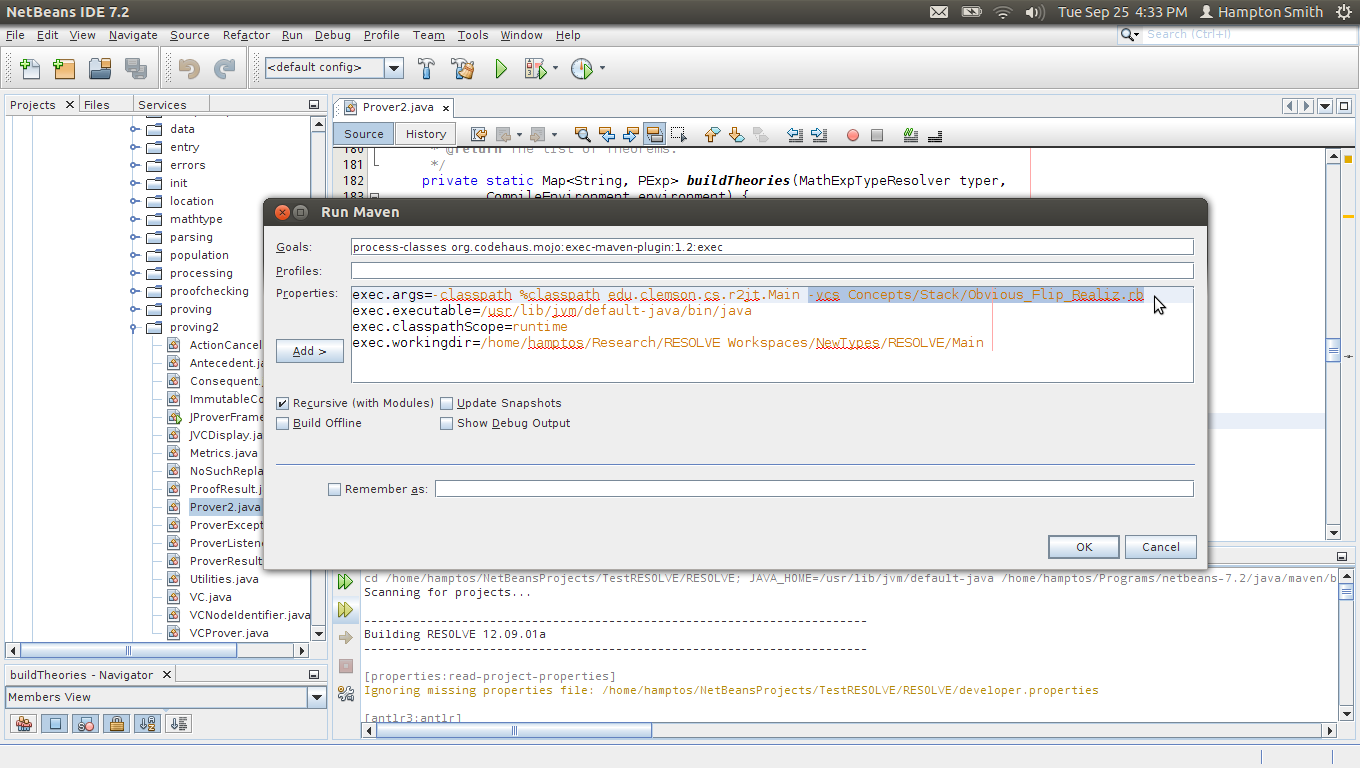
Once you've run RESOLVE once the above way, along the left side of the console, there are a number of icons. The top two will look identical except the second one is a different color:

Clicking it will open a list of properties that are being sent through to Maven, including one called exec.args. After the "classpath" part, you'll see all your command line arguments from the Run Configurations pane. You can just change these directly, then hit Ok and the compiler will be run again with the new arguments.
This section is on how to perform specific git actions in Netbeans. For our general git workflow, please read RESOLVE Git Workflow.
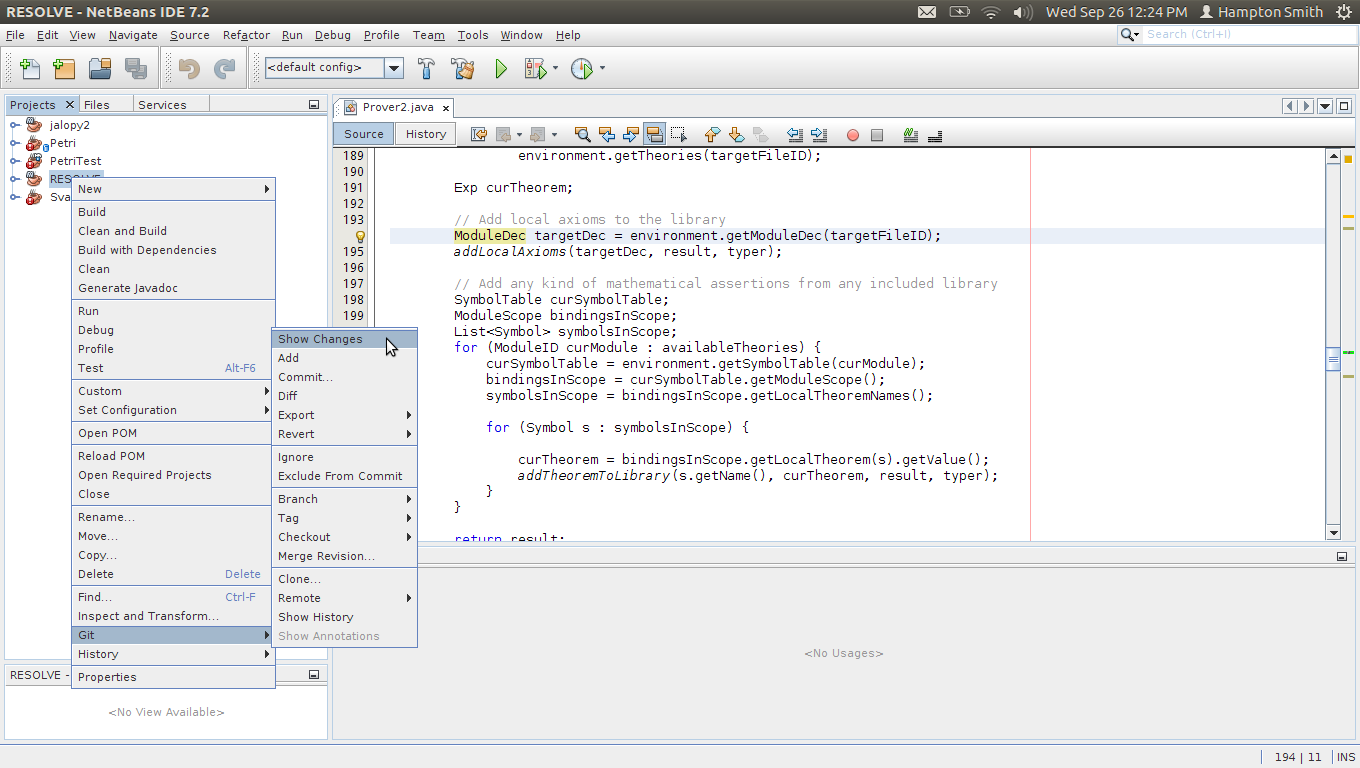
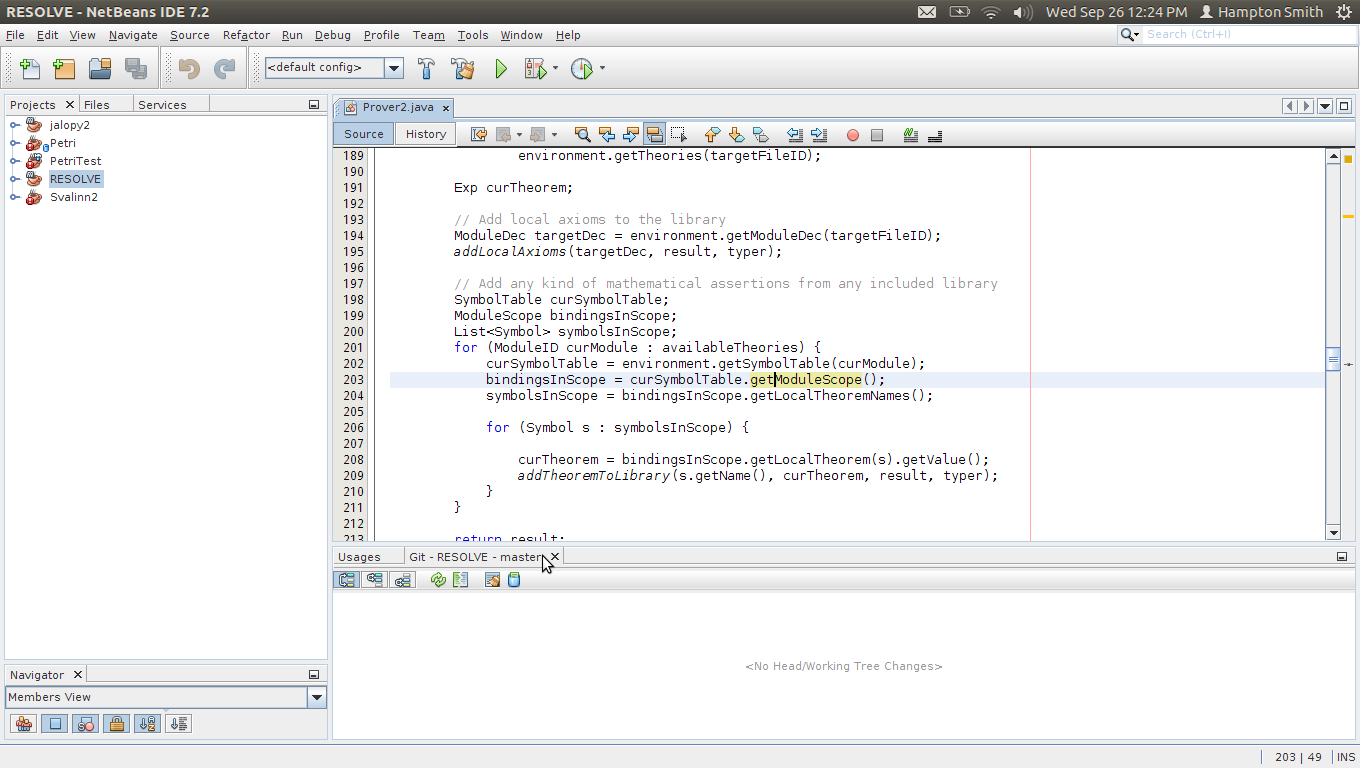
You can display your current branch by pulling up the "show changes" tab. Right click the project, and select Git > Show Changes.
In the console area a new tab will display. The name of this tab will be Git - RESOLVE - <branchname>, where <branchname> is the name of your current branch.
You can change branches by right clicking the project and selecting Git > Branch > Create Branch and Git > Branch > Switch To Branch.
Keep in mind two things about branching in Git:
- Creating a branch does not switch to that branch. If you want to create a branch AND switch to it at the same time, use
Git > Branch > Switch To Branchand selectCheckout as New Branch. - Branching is cheap and easy. Branch with abandon.
- Any uncommitted changes come with you when you change branches. Changes to your files only become part of the branch's history when you commit. As a result, switching branches can fail, if some change you've made conflicts with a change that's sitting, committed, on the other branch.
